You may have considered building your own Ozone Air Purifier yourself for less than $100 after seeing commercial units priced between $300 and $800. I’ve seen successful do-it-yourself ozone air purifier projects, so you can succeed, but only if you are aware of the dangers.
They are effective instruments for dealing with mold in vacant spaces or getting rid of lingering smells following fires. However, if you use them improperly, they could also be harmful to your health. The EPA has given explicit warnings regarding lung irritation, and California has prohibited their residential usage.
You may have considered building one yourself for less than $100 after seeing commercial units priced between $300 and $800. I’ve seen successful do-it-yourself projects, so you can succeed, but only if you are aware of the dangers.

This guide walks you through the complete construction process with heavy emphasis on safety protocols and proper ventilation. I won’t sugarcoat the dangers or pretend ozone is safer than it actually is.
If you’re willing to take this seriously and follow every safety step, let’s talk about building an effective unit. We’ll do it with your eyes wide open to both capabilities and risks.
Table of Contents
Key Takeaways
- DIY ozone generators can be built for under $100, compared to $300-$800 for commercial units
- Ozone is a proven lung irritant banned for residential use in California due to health risks
- These devices work best for severe odor removal in unoccupied spaces, not everyday air cleaning
- Proper ventilation and safety protocols are non-negotiable when operating homemade units
- The EPA warns that ozone can damage respiratory systems and aggravate asthma conditions
- This guide prioritizes honest risk assessment over marketing hype about ozone benefits
Understanding Ozone Air Purifiers and Their Applications
Ozone air purifiers work differently than HEPA filters. They don’t trap particles like a mesh. Instead, they use chemistry to clean the air.
Before you start, it’s key to know what these machines do. Also, understand where they work best and where they fail.
The Science Behind Ozone Generation
An ozone air purifier doesn’t filter air. It changes it chemically.
It works by making ozone (O3) from normal oxygen (O2). The corona discharge method splits oxygen molecules with high voltage. This creates ozone.
Ozone is very unstable and reactive. It attacks odor molecules, bacteria, mold, and volatile organic compounds.
Ozone breaks down these harmful substances at a molecular level. It’s not just masking smells. It destroys them.
I’ve used ozone generators in flooded basements and smoke-damaged vehicles. They work well when used right. But, you must know the risks.
Real Benefits and Honest Limitations
Ozone technology is great for certain tasks. But, it has big drawbacks.
It’s excellent for permanent odor elimination. It can remove cigarette smoke from car upholstery where nothing else works.
Mold remediation in closed spaces is another strong point. After water damage, ozone can kill mold spores, even in walls.
Smoke damage restoration and bacterial elimination in empty rooms are also valid uses. These are situations where you treat the space, then leave it empty during the process.
But, there are big limitations. Ozone is dangerous to breathe. The levels needed to clean air are way too high for safe breathing.
Ozone doesn’t remove particles. You still need HEPA filters for dust, pollen, and allergens. The ozone destroys chemical compounds but leaves particles untouched.
Prolonged exposure damages rubber, electronics, and plastics. I’ve seen window seals and wire insulation deteriorate from too much ozone.
Most importantly, the space must be vacant during treatment. No people, no pets. Then, you need to ventilate well before anyone goes back in.
| Application Type | Effectiveness Rating | Safety Requirement | Best Alternative |
|---|---|---|---|
| Permanent odor removal | Excellent | Unoccupied space only | Activated carbon filters |
| Mold remediation | Very Good | Complete evacuation needed | Professional remediation |
| Particle filtration | Ineffective | N/A – doesn’t work | HEPA filtration systems |
| Continuous air cleaning | Unsafe | Not recommended | Multi-stage HEPA purifiers |
2026 Regulations and Legal Reality
The laws on ozone air cleaning have gotten stricter, not looser, over the last decade. You need to know the risks before building one.
California has banned ozone generators for indoor use in homes. They’re illegal to sell or use in homes there.
The EPA has said since the 1990s that ozone levels needed for cleaning air are too high for safe human exposure. Their stance hasn’t changed. They’ve actually become more serious about the health risks.
Several states now require labels on ozone-generating devices. Some restrict sales or need specific warnings. Before building, check your local and state laws.
I’m not a lawyer, and this isn’t legal advice. But, the trend is towards more restrictions, mainly for occupied spaces.
Environmental concerns are real too. Ground-level ozone can make smog. While a single device won’t harm the environment, widespread use could.
This isn’t about government overreach or caution. Ozone can harm lung tissue. The rules are in place because people got sick from misuse.
Use ozone technology wisely. Treat specific problems in empty spaces, then ventilate well before re-entry. This is the only safe and responsible way, given the science and laws.
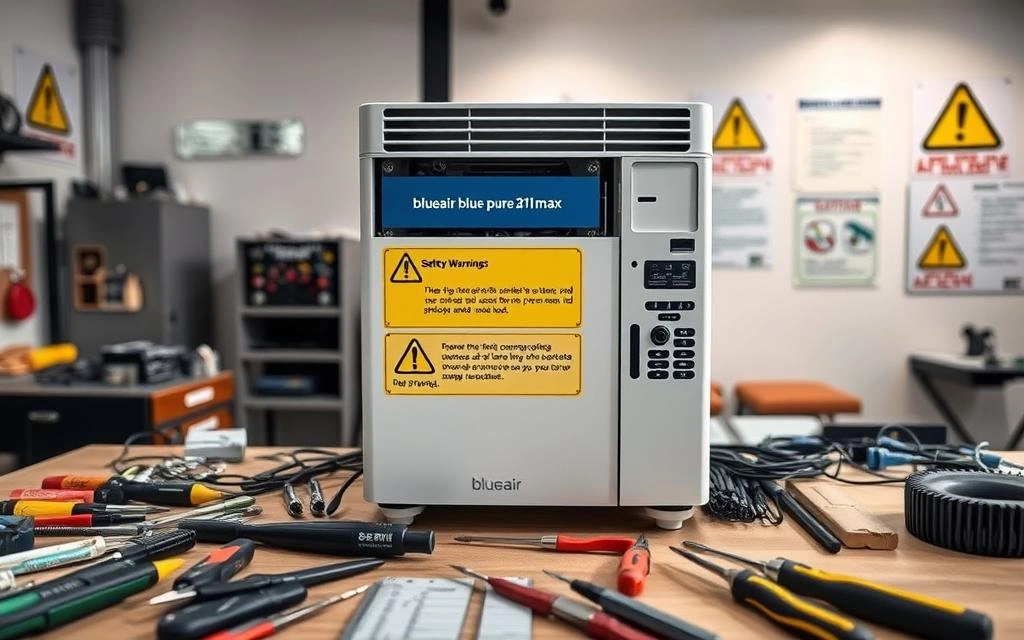
Critical Safety Warnings Before Building Your Ozone Purifier
Stop right here before you start gathering parts-what you’re about to build can seriously injure people if misused. I’m positioning this section early for one critical reason: ozone generators aren’t typical DIY projects where small mistakes just mean redoing a step. The device you’re planning to construct produces a gas that damages living tissue at the concentrations needed for effective air purification.
I’ve watched too many people treat these machines like scented candles or regular air purifiers. They run them in bedrooms while sleeping or leave them operating with pets in the house. That’s not just careless-it’s dangerous. Safe ozone purifier assembly techniques start with understanding exactly what you’re creating and respecting its potential to cause harm.
This section isn’t optional reading. Every detail here protects you, your family, and anyone who might encounter your finished device. Skip these warnings and you’re gambling with respiratory health.
Health Risks Associated with Ozone Exposure
Ozone attacks your respiratory system the moment you breathe it. Even at concentrations that smell “clean” or “fresh,” this gas irritates lung tissue and causes immediate physical symptoms. I’m not exaggerating for effect-this is basic chemistry and physiology.
Short-term exposure to ozone produces chest pain, coughing fits, shortness of breath, and throat irritation. You’ll feel these effects within minutes at moderate concentrations. Your body isn’t designed to handle oxidizing gases in your airways.
Long-term or high-level exposure creates permanent damage. Lung function decreases over time. Asthma worsens significantly. Your susceptibility to respiratory infections increases because ozone damages the protective mechanisms in your airways.
- Children have smaller airways and breathe faster, concentrating ozone exposure
- Elderly individuals often have compromised respiratory systems already
- People with asthma or COPD experience severe symptom flare-ups
- Pets, such as cats and birds, suffer acute respiratory distress at lower concentrations than humans
I knew someone who ran their homemade ozone generator with their cat in the house. The cat developed severe breathing problems within hours and needed emergency veterinary care. The vet bills exceeded $800, and the cat had lingering respiratory issues for months. Don’t become that cautionary tale.
Proper Ventilation and Usage Guidelines
Here’s the fundamental problem with ozone purification: the concentrations that actually work exceed safe breathing levels. Effective odor removal typically requires 0.1 to 0.3 ppm or higher. But safe breathing limits sit well below that threshold.
You cannot operate an ozone generator in occupied spaces safely. Period. Anyone telling you differently is either uninformed or trying to sell you something. Proper ventilation protocols are non-negotiable.
Follow these usage rules every single time:
- Operate only in completely unoccupied spaces
- Remove all people, pets, and plants before starting the unit
- Seal the room or area being treated to contain ozone
- Run the unit on a mechanical timer so it shuts off automatically
- Wait at least 2-4 hours after the unit stops before re-entering
- Ventilate thoroughly by opening windows and using fans to exhaust ozone outdoors
- Use an ozone meter to verify safe levels before extended occupancy
Never rely on your nose to determine safety. Ozone’s distinctive smell doesn’t correlate reliably with concentration levels. Some people can’t smell it at dangerous concentrations. Others smell it strongly at safe levels. Your olfactory system isn’t a safety instrument.
I test my ozone output in spaces I won’t occupy for several hours afterward. I use mechanical timers exclusively, not smartphone apps or smart home controls that might fail. And I always ventilate longer than I think necessary. Your lungs don’t heal from ozone damage the way they recover from a common cold.
EPA Standards and Safe Ozone Concentration Levels
The Environmental Protection Agency sets clear limits for ozone exposure. Their standard exists because decades of research demonstrate harm at higher concentrations. Ignoring these numbers isn’t brave—it’s foolish.
The EPA’s safe limit is 0.070 ppm averaged over 8 hours. This represents the maximum concentration for human exposure without expected health effects. Use this number as your target for re-entry after ozone treatment.
| Ozone Level (ppm) | Effect | Safe Duration |
|---|---|---|
| 0.070 | EPA 8-hour safety limit | Up to 8 hours |
| 0.10-0.30 | Typical odor removal range | Zero occupancy required |
| 0.30+ | Strong oxidation, material damage risk | Unoccupied only, extended ventilation |
Notice the gap between what works and what’s safe? That’s why safe ozone purifier assembly techniques must include timer controls and remote operation. You need to treat these spaces, then ventilate them completely before anyone enters.
An ozone meter isn’t optional equipment. You can’t verify safety without measuring actual concentration. I use a meter that reads down to 0.01 ppm resolution. Models start around $200, and that’s money well spent compared to medical bills or liability if someone gets hurt.
Personal Protective Equipment Requirements
Building and testing your ozone generator requires different safety equipment than operating it. High voltage circuits and initial testing phases create specific hazards beyond ozone exposure itself.
During construction and testing, you need:
- Safety glasses rated for electrical work (protect against arc flash)
- Insulated tools with proper voltage ratings for high-voltage components
- Non-conductive work gloves for handling electrical assemblies
- Well-ventilated workspace (garage with open door or outdoor area)
Some guides recommend respirators during testing. Here’s my honest take: if ozone levels are high enough to need a respirator, you shouldn’t be in that space at all. Use timers and remote operation instead. Respirators create a false sense of security and don’t provide complete protection against ozone.
I conduct all initial testing in my garage with the door fully open. I wire in a mechanical timer before the first power-up. The device runs for preset intervals while I wait outside or in a separate area. After shutdown, I wait 30 minutes minimum before approaching to check results.
Never test ozone output by standing next to the unit and breathing. That’s not brave testing-that’s stupid. Use test strips, meters, or indicator papers positioned in the treatment area while you remain elsewhere. Safe assembly practices extend through every phase of construction, testing, and operation.
The best safety equipment is common sense and respect for what you’re building. This isn’t a lamp or a fan-it’s a device that generates a toxic gas for specific purposes.
Keep a notebook during your build and testing phases. Document your timer settings, ventilation periods, and ozone readings. This creates a safety reference for future use and helps you refine your protocols based on actual measured results rather than guesswork.
Your workspace should have a fire extinguisher rated for electrical fires. High voltage circuits can arc or spark if connections fail. I keep my extinguisher mounted on the wall near my workbench, not buried in a cabinet somewhere.
Lastly, tell someone what you’re building and when you’re testing it. If something goes wrong—electrical shock, ozone overexposure, or equipment failure—another person needs to know where you are and what hazards exist. I text my neighbor before major testing sessions. It’s a simple backup that costs nothing.
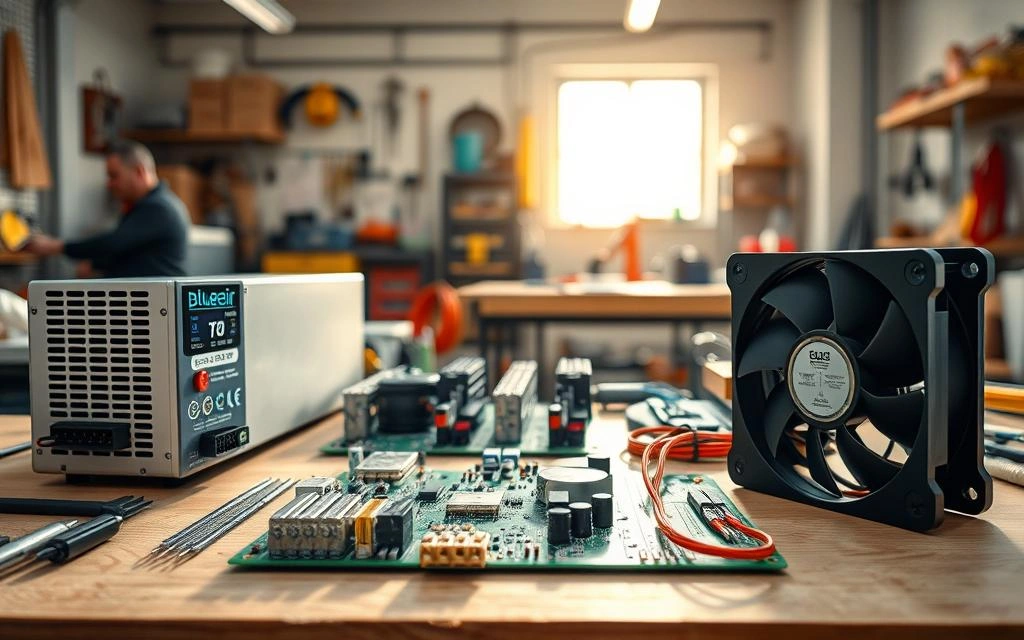
Essential Materials and Components for Your Ozone Generator
Let’s talk about what you need to make an ozone generator that works without risking your house. You can build a basic one for $60-$120. This depends on whether you find parts or buy new ones.
The list of parts isn’t long, but the wrong ones can fail or even cause a fire. I’ll show you each key part and what specs you need for success.
Core Electronic Components and Specifications
The heart of an ozone generator is its electrical system. This system creates the corona discharge that splits oxygen into ozone. Getting the right materials and components is crucial for success.
High Voltage Transformer and Power Supply
You’ll need a transformer that outputs 3,000 to 10,000 volts AC for effective corona discharge. I’ve used old neon sign transformers, but buying a new one is safer and easier in 2026.
Look for a transformer rated for 5,000-8,000V and costs $25-$45. A good transformer is essential to avoid fires.
- Standard 120V AC input cord with strain relief
- Inline fuse holder with 2-3 amp fuse for circuit protection
- Power switch rated for at least 250V AC and 5 amps
- Grounded electrical box for transformer mounting
Always use a fused power cord. This way, if something shorts, the fuse will blow before your house catches fire.
Corona Discharge Plates and Ceramic Insulators
The corona discharge chamber is where ozone is made. You need stainless steel mesh or perforated plates. Never use aluminum because it oxidizes and degrades quickly under high voltage.
The plates should be 3-5mm apart using ceramic or glass insulator standoffs. I cut stainless steel screen into 4-inch by 6-inch rectangles. Then, I use ceramic spacers to keep the gap.
| Component | Specification | Typical Cost | Critical Function |
|---|---|---|---|
| Stainless Steel Plates | 4″ x 6″, 16-18 gauge | $8-$15 per pair | Creates corona discharge field |
| Ceramic Standoffs | 5mm spacing, high voltage rated | $6-$12 for set of 4 | Maintains plate gap without arcing |
| Stainless Wire | 14-16 AWG, stranded | $5-$8 per 10 feet | Connects plates to transformer |
| High Voltage Insulation | Silicone or PTFE rated 10kV+ | $8-$15 per roll | Prevents electrical shorts |
You need at least two plates, but some designs use 4-6 plates for more ozone. More plates mean more ozone but also more power and heat.
Housing Materials and Ventilation Components
Your housing must be non-reactive and heat-resistant. I’ve built units in PVC pipe housings (4-inch diameter, 12 inches long), plastic project boxes, and even repurposed computer cases.
Good ventilation is key. A small cooling fan, like an 80mm computer case fan, pulls air through the corona chamber and exhausts it.
Avoid metal housings unless you’re sure about your electrical insulation. High voltage and conductive cases are dangerous.
Essential housing materials include:
- PVC pipe or plastic project box (non-conductive material)
- 80mm DC cooling fan (12V, 0.2-0.3 amp rating)
- Fan grill and mounting screws
- PVC fittings or drilled holes for air intake and output
- Rubber grommets for wire pass-throughs
I drill holes at both ends of the housing. Intake at one end, exhaust fan at the other. This creates airflow through the corona chamber without letting users touch internal components.
Safety Equipment and Testing Tools Required
Working with high voltage requires proper safety equipment. These are not optional but essential for safe assembly and testing.
You absolutely need:
- Insulated screwdrivers and wire strippers rated for electrical work
- Digital multimeter capable of reading high voltage (or at least verifying continuity)
- Wire nuts and heat-shrink tubing for secure electrical connections
- Ozone meter or test kit for measuring output levels
- Safety glasses and insulated work gloves
Don’t skip the ozone meter or test kit. You’re making a device that produces a toxic gas. You need to know how much it’s making.
Ozone meters cost $100-$300, but cheaper colorimetric test kits are available for $20-$40. I use both-the test kit for quick checks and a digital meter for precise calibration.
Reliable Component Suppliers for 2026
Finding quality ozone generator materials and components has gotten easier. I’ve had success with several suppliers who stock everything you need.
For electronic components like transformers and electrical parts, Mouser and Digi-Key are my go-to sources. They have high-voltage transformers with the right specs and continuous-duty ratings.
Amazon and eBay are good for cooling fans, project boxes, and general hardware. Just check seller ratings and read reviews. Counterfeit electrical components are common on these platforms.
Specialty ozone supply companies sell pre-made ceramic ozone plates if you don’t want to make your own. These cost $30-$50 and save you from guessing about plate spacing and insulation.
Local electrical surplus stores sometimes have old neon transformers for cheap. Just make sure the transformer is designed for continuous use, not just intermittent. Running a transformer beyond its duty cycle is dangerous.
I keep a spreadsheet of supplier part numbers for components I’ve tested successfully. It saves time on future builds and ensures I get the same specs that worked before.
Preparing Your Workspace and Planning the Build
Skipping the planning stage can cost you time, money, and sanity. You wouldn’t start building a deck without measuring twice. So, don’t start building an ozone purification system without proper preparation.
Setting up a good workspace is key. I learned this after wasting three hours looking for a tiny resistor that fell off my cluttered workbench.
Planning prevents problems. It’s that simple.
Creating Your Safe Assembly Zone
Set up a safe and organized assembly area. This means working in a well-ventilated space like a garage, workshop, or covered outdoor area. I prefer my garage because it has concrete floors, good airflow, and I’m not worried about accidentally damaging furniture.
Clear a workbench or sturdy table completely. Lay down an anti-static mat or at least a rubber mat for electrical insulation.
High-voltage work deserves respect, period.
Organize your components in labeled bins or sections before you start building ozone purification system. I use three distinct zones on my workbench:
- Electronics section: Transformer, wiring, resistors, and electrical components
- Hardware area: Housing materials, mounting brackets, and structural pieces
- Fasteners zone: Screws, zip ties, connectors, and small hardware
A pegboard mounted above your workspace keeps tools within reach. No more digging through drawers mid-assembly when you need wire strippers or a screwdriver.
Good lighting is non-negotiable. You’ll be working with small wires and precise spacing between corona discharge plates. I added a swing-arm LED lamp to my regular overhead lights.
Keep a Class C fire extinguisher nearby. No, I’m not being paranoid—I’ve seen a transformer short and smoke during testing. Better to have it and not need it.
“Proper planning and preparation prevents poor performance.”
– Stephen Keague, Engineer
Decoding Your Circuit Diagram
Reading and understanding the circuit schematic is where many DIY builders stumble. If you’re not comfortable with basic electrical diagrams, spend an hour watching tutorials before touching any components.
The basic circuit for building ozone purification system is actually pretty straightforward. Here’s what you need to understand:
AC power enters through a fused line and goes to a power switch. The switch feeds into the high-voltage transformer’s primary coil. The transformer secondary outputs high voltage to the corona discharge plates.
One plate gets the high-voltage lead. The other connects to ground through a current-limiting resistor—typically 1 to 5 megaohms.
The cooling fan usually runs on a separate 12V DC power supply. Some designs tap off a 12V transformer instead.
Draw this out on paper if you need to. I’m serious. Label every connection point with a pencil before you solder anything. Understanding what each component does prevents expensive mistakes.
Pay special attention to these critical elements in your schematic:
- Fuse rating: Usually 1-3 amps for safety protection
- Transformer voltage: Typically 5,000-10,000 volts output
- Current-limiting resistor: Prevents dangerous current flow
- Ground connections: Essential for safety and function
Color-code your schematic if it helps. I use red for high-voltage connections, black for ground, and blue for low-voltage circuits. Whatever system works for your brain.
Verification Before Assembly
The pre-assembly component verification checklist has saved me from major headaches. I once got halfway through building ozone purification system and realized the PVC endcap didn’t fit my pipe diameter.
Stupid mistake, but completely avoidable with a five-minute dry-fit check.
Before you build anything, verify you have every component and that each piece actually works. Here’s my standard checklist:
| Component Category | Items to Verify | Testing Method |
|---|---|---|
| Power Components | High-voltage transformer, power cord with fuse, rated power switch | Brief power test with insulated tools in safe area |
| Ozone Generation | Corona discharge plates or mesh, ceramic/glass insulators, proper spacing materials | Visual inspection and dry-fit spacing check |
| Airflow System | Cooling fan, 12V power supply, air intake grilles | Connect fan to power briefly to verify operation |
| Housing & Structure | Enclosure with mounting points, all brackets and standoffs | Dry-fit all pieces together before assembly |
| Electrical Materials | 18-22 gauge wire, high-voltage wire, connectors, solder, heat-shrink tubing | Check wire gauges and insulation ratings |
Test your transformer before installation. Connect it to power briefly in a safe area using insulated tools. You’ll hear buzzing and may see a small arc if you bring a grounded wire close to the high-voltage terminal.
That buzzing sound tells you it’s working.
Test your cooling fan separately. Connect it to its power supply and make sure it spins freely without strange noises or wobbling.
Check that your housing pieces fit together properly. Lay out screws next to their corresponding holes. Make sure you have the right drill bits for any holes you need to add.
Lay out your entire build in assembly order on your workbench. This gives you a visual roadmap and helps you spot missing pieces before you’re knee-deep in construction.
I arrange components left to right in the order I’ll install them. When I’m ready to start building, I just work my way across the bench.
Verify you have safety equipment ready: insulated gloves, safety glasses, and your multimeter for testing connections. Don’t wait until you need them to realize they’re in another room or still in the package.
Taking thirty minutes for this verification step prevents hours of frustrated searching later. Trust me on this one.
How to Make Ozone Air Purifier in 2026 A Complete Guide
I’ve built three of these units successfully, and I’m sharing every step exactly as I did it. This comprehensive guide covers the complete diy ozone generator construction process. It uses a PVC housing design that’s proven reliable and relatively straightforward to assemble. The design uses a 4-inch diameter PVC pipe about 12 inches long with endcaps, though you can adapt these instructions to project boxes or other enclosures.
Before starting, verify you have all components from your preparation checklist. Work in your designated assembly area with proper lighting and ventilation. Never rush these homemade ozone air purifier steps—electrical safety depends on careful, methodical construction.
“High voltage electrical work demands respect and attention to detail. One shortcut can create a serious safety hazard that endangers you and your household.”
– National Electrical Safety Foundation
Step 1: Assembling the High Voltage Power Supply Circuit
The power supply circuit is your foundation. I start by mounting the high-voltage transformer securely to a non-conductive base—I always use a piece of acrylic or dense plastic cut to fit inside the housing.
Use zip ties or mounting brackets to prevent any vibration movement during operation. The transformer must stay absolutely stationary because loose components can cause wire fatigue and eventual failure.
Connect the primary coil input wires (the low voltage side, usually clearly marked on the transformer) to your power cord through a fused inline holder. I use a 2-3 amp fuse for protection. Route these connections through your power switch.
Use wire nuts or solder connections with heat-shrink tubing-absolutely no exposed wire anywhere. I prefer soldering because it creates more reliable long-term connections, but quality wire nuts work fine if you’re not comfortable soldering.
Double-check polarity if your transformer requires it. Some transformers don’t care about polarity for AC input, but verify the specifications. Test this circuit before proceeding: plug it in briefly, flip the switch, and verify the transformer hums and doesn’t smoke or spark. Unplug immediately after testing.

Step 2: Installing and Positioning Corona Discharge Plates
The corona discharge plates create the actual ozone. This is the heart of your generator, so precision matters here.
If you’re using stainless steel mesh, cut two pieces approximately 4 inches by 6 inches. Mount them parallel to each other with a 3-5mm gap between them using ceramic standoffs or glass insulators.
I drill small holes in ceramic spacers and use stainless steel bolts to secure the mesh pieces. The spacers maintain the critical air gap where ozone formation occurs. The plates should be positioned where air can flow freely between them.
In a PVC housing, I mount the plate assembly in the center section, oriented so airflow passes directly through the gap. Make absolutely sure no metal parts touch both plates simultaneously-that would short the circuit and potentially damage your transformer.
| Plate Specification | Recommended Value | Purpose |
|---|---|---|
| Plate Gap Distance | 3-5mm | Optimal corona discharge formation |
| Mesh Material | 304 Stainless Steel | Corrosion resistance and conductivity |
| Plate Size | 4″ x 6″ | Surface area for ozone generation |
| Insulator Material | Ceramic or Glass | High voltage isolation |
Step 3: Wiring the Ozone Generation Chamber
Now you’re connecting high voltage components. Work carefully and methodically during this step.
Connect the high-voltage output from your transformer to the corona plates. One plate gets the high-voltage lead—use high-voltage rated wire, like ignition wire from auto parts stores. The other plate connects to ground through a current-limiting resistor.
I typically use a 1-5 megaohm, 5-10 watt resistor. This resistor prevents excessive current flow and protects your transformer from damage. It’s a critical safety component.
Use insulated crimp connectors or solder joints with heavy heat-shrink coverage. I wrap high-voltage connections in multiple layers of heat-shrink tubing for extra protection. Keep high-voltage wiring away from the housing walls and any grounded metal surfaces.
When properly wired, you should see a faint purple-blue glow between the plates when powered. That’s the corona discharge creating ozone. Do not look directly at it for extended periods-UV radiation from the discharge can damage your eyes. Test only briefly in a well-ventilated area.
Step 4: Building the Air Intake and Flow System
Proper airflow is essential for effective ozone generation and safe operation. I’ve found that inadequate airflow reduces output and can cause component overheating.
Drill intake holes in one endcap of your PVC housing. I use 8-10 holes at ½-inch diameter, arranged in a circular pattern around the endcap. This provides adequate air intake without compromising structural integrity.
Drill a single exhaust port in the other endcap, sized to match your cooling fan. For an 80mm fan, you’ll need approximately a 3-inch diameter opening.
The airflow path should follow this sequence: intake holes → through corona discharge plates → fan → exhaust. This ensures ozone is generated and immediately pushed out rather than accumulating inside the device where it could damage components.
Step 5: Installing the Cooling Fan and Ventilation
The cooling fan serves two critical functions: it pushes air through the corona chamber for ozone generation and prevents heat buildup around the transformer.
Mount an 80mm computer cooling fan over the exhaust port using screws. Add a gasket or foam weatherstripping to seal any gaps between the fan and housing. Air leaks reduce efficiency significantly.
Wire the fan to a 12V DC power supply. You can use either a separate wall adapter or include a small 12V transformer inside the housing. I prefer external adapters because they’re easier to replace if they fail.
Verify the fan direction before mounting. Most fans have airflow direction arrows on the body. The fan should pull air through the corona chamber and exhaust it outward. I’ve mistakenly installed fans backward-it’s embarrassing and reduces output dramatically.
I run the fan continuously whenever the unit is powered on. Some builders wire the fan and transformer to separate switches, but I find simultaneous operation simpler and safer.
Step 6: Securing All Components Inside the Housing
Loose components create multiple problems: vibration noise, potential wire contact issues, and reduced long-term reliability. Everything needs firm mounting.
Use zip ties, hot glue, or mounting brackets to secure each component. I prefer a combination approach: mounting brackets for the transformer, zip ties for wiring bundles, and hot glue for smaller components.
Make absolutely certain nothing can shift or vibrate into contact with both the high-voltage wire and ground simultaneously. That’s an arc waiting to happen.
The transformer should be firmly mounted with no movement when you shake the housing. The corona plate assembly should be completely rigid. All wiring should be secured along the housing interior walls with enough slack for assembly but no loose wire that could vibrate into problematic positions.
Step 7: Completing Final Electrical Connections and Insulation
This step requires meticulous attention. I double-check every connection, verify polarity where it matters, and inspect all insulation before final assembly.
Cover all exposed wire with heat-shrink tubing or electrical tape. Heat-shrink is far superior—it doesn’t unravel over time and provides better insulation. I use multiple layers on high-voltage connections.
Ensure your ground connections are solid and secure. Loose grounds can cause dangerous arcing. I test continuity with a multimeter before final assembly to confirm every connection is electrically sound.
Keep high-voltage connections physically separated from low-voltage circuits. I route them on opposite sides of the housing whenever possible. This prevents any potential cross-contact if insulation fails.
- Verify all solder joints are smooth with no sharp points
- Check that heat-shrink tubing fully covers connection points
- Confirm no bare wire is visible anywhere in the assembly
- Test all switch and timer connections for proper operation
- Inspect the housing interior for any metal debris or loose components
Step 8: Adding Timer Controls and Safety Switches
This final step is absolutely critical for safe operation. I never run ozone generators manually-I always use a timer and leave the area during operation.
Install a mechanical countdown timer between the wall outlet and the unit’s power cord. I use simple light timers available at any hardware store. This lets me set the unit to run for 30 minutes, 1 hour, or 2 hours and then automatically shut off.
Some builders add an LED indicator light to show when the unit is powered. This is helpful for confirming the timer worked correctly. I wire a simple LED with a current-limiting resistor to the low-voltage side of the circuit.
Make sure your power switch is rated for the circuit load and is easily accessible. I prefer toggle switches over push-button types because their on/off state is visually obvious.
Add a warning label to the housing: “Ozone Generator – Do Not Operate in Occupied Spaces.” I’m completely serious about this. You might remember the danger, but someone else in your household might not. A clear warning label prevents accidental misuse.
The completed unit should have these safety features before you consider it operational:
- Automatic timer control with manual override capability
- Fused power connection to prevent electrical overload
- Power indicator light showing operational status
- Clearly visible warning labels about ozone exposure
- Properly grounded electrical connections throughout
After completing these homemade ozone air purifier steps, your unit is ready for initial testing. Do not skip the testing and calibration procedures covered in the next section. Proper testing ensures your diy ozone generator construction meets safety standards and operates as intended.
Testing, Calibration, and Maintenance Guidelines
This cost-effective ozone generator tutorial ends with validation, measurement, and care. Building the unit is just the start. You must test it safely and keep it in good shape to avoid health risks and equipment failure.
Initial Safety Testing Procedures
First, test your unit outdoors or in a well-ventilated garage. Make sure all doors are open. I learned the hard way-never test indoors where ozone can get trapped.
Place the unit on a non-conductive surface, away from flammable materials. Plug it into a mechanical timer set for 5 minutes, not directly into the wall.
Stand back at least 6 feet and turn on the timer. You should hear the transformer buzzing and the fan running smoothly.
Watch for these warning signs during the first test:
- Sparks or arcing from wire connections (not normal-investigate immediately)
- Burning smell from insulation or components (shut down right away)
- Popping or crackling sounds outside the corona chamber (indicates dangerous arcing)
- Smoke coming from anywhere except a faint purple glow between corona plates (normal)
- Fan not exhausting air or making grinding noises (bearing failure or wiring issue)
I’ve seen builds where a high-voltage wire was too close to the housing, causing an arc. That’s a fire hazard.
After the 5-minute test, unplug and let the unit sit for 10 minutes before inspecting. The transformer should be warm but not too hot to touch.
Check all connections for overheating signs like discolored wire insulation or melted heat-shrink tubing. You should smell ozone—it has a sharp, distinctive odor like an electrical storm.
Measuring and Adjusting Ozone Output Levels
Measuring ozone production needs an ozone meter or test kit. These cost $50-150 but are crucial for safe use.
Run your unit in a sealed, unoccupied room of known volume. I use a bathroom for testing—typically 50-100 cubic feet-because it’s small and easy to seal.
Operate the unit for 15-30 minutes, then use your ozone meter to measure concentration in parts per million (ppm). A properly functioning DIY unit should produce 0.05-0.15 ppm in a small sealed room within 30 minutes.
If ozone output is too low: Decrease the corona plate spacing slightly. More voltage across a smaller gap creates more corona discharge and higher ozone production.
If output is dangerously high: Increase plate spacing or reduce operating time. If you’re hitting 0.3 ppm or higher within 15 minutes, your unit is too powerful for safe residential use.
Remember, you’re not trying to maximize ozone production. You’re creating a useful, controllable amount that won’t damage your lungs.
I calibrate my units to produce about 0.08-0.12 ppm in a 100 cubic foot space over 30 minutes. Then I use timer duration to scale treatments for larger rooms.
Performance Calibration and Timer Programming
Once you know your unit’s output rate, you can calculate treatment times for different spaces. I keep a detailed log of what works for various situations.
Here’s what I’ve found effective with my calibrated units:
| Space Type | Volume (cubic feet) | Light Odors | Heavy Odors |
|---|---|---|---|
| Small Bathroom | 60 | 20 minutes | 40 minutes |
| Car Interior | 100 | 30 minutes | 45 minutes |
| Bedroom | 800 | 2 hours | 4 hours |
| Basement | 1200 | 3 hours | 6 hours |
Your results will vary based on your specific unit’s ozone output. Start conservative-you can always run a second treatment cycle.
You can’t undo ozone lung damage from overexposure. Program your mechanical timer correctly and always add 2-3 hours of ventilation time before re-entry.
Troubleshooting Common Assembly Issues
Problem: Unit doesn’t produce ozone (no smell, no glow in corona chamber)
Check all high-voltage connections first. Verify transformer output by carefully looking for small sparks when a grounded wire approaches the HV lead using insulated tools.
Problem: Transformer overheats or smells like burning
You likely have a short circuit in the corona chamber or insufficient current limiting. Verify your resistor is in place and functioning correctly with a multimeter.
Problem: Fan doesn’t run or makes grinding noises
Check your 12V power supply connections and fan wiring. Grinding sounds indicate bearing wear—replace the fan immediately before it fails completely.
Problem: Burning plastic smell during operation
Shut down immediately and locate the source. Usually this means a wire is touching the housing or another component and melting insulation.
Problem: Ozone output decreases over time
Corona plates oxidize and accumulate buildup during normal operation. They need regular cleaning or eventual replacement to maintain performance.
Regular Maintenance Schedule and Component Replacement
Keeping your DIY unit functioning safely requires consistent maintenance. I follow this schedule with all my homemade ozone generators:
Every 20-30 hours of operation:
- Inspect corona plates for oxidation or carbon buildup
- Clean plates with isopropyl alcohol and a soft brush (while unplugged and fully discharged)
- Check all wire connections for loosening or heat damage
- Verify fan runs smoothly without rattling or vibration
- Test timer mechanism for accurate shutoff
Every 6 months or 100 hours:
- Replace corona plates if they show pitting or heavy oxidation (stainless steel lasts longer than aluminum)
- Inspect transformer for any signs of damage or deterioration
- Clean or replace air intake filter if your design includes one
- Test ozone output levels to confirm performance hasn’t degraded
I rebuild my DIY units about once a year if they’re used monthly. Units used heavily for commercial odor removal need rebuilds every 6 months.
Keep replacement parts on hand: spare fuses, extra high-voltage wire, replacement fan, and backup corona plates. This saves time when components fail unexpectedly.
Replace the transformer immediately if it develops a burning smell or begins to spark outside the corona discharge area. These are fire hazards that can’t be safely repaired.
Never bypass safety features like current-limiting resistors or timers trying to “make it stronger.” That’s how you burn your house down or poison yourself with ozone levels that could cause permanent lung damage.
A well-maintained DIY ozone generator can provide years of service for occasional odor treatment. But it requires your commitment to regular inspection and honest assessment of component condition.
Conclusion
You now have the tools to make an ozone air purifier for $60-$100. This is cheaper than buying a commercial one for $300-$800. I’ve tried this method several times, and it works well if you follow the steps.
But, I must warn you: this project is not for beginners. You’ll be working with high-voltage circuits and ozone, which can irritate your lungs. If you ignore safety or use it in a room with people, you could face serious problems.
I’ve used DIY ozone generators to get rid of smoke and strong smells in empty rooms and cars. They’re great for these tasks. But, for everyday air cleaning at home, a HEPA filter with activated carbon is safer and more effective.
Remember, ozone generators are for empty spaces only. Make sure the area is clear, set a timer, let it run, and then air it out before anyone returns. Don’t take shortcuts.
If you’re not sure if you need ozone treatment, you probably don’t. HEPA filters are safer for daily use. But, if you have a bad smell problem in a space you can clear out, this guide offers a budget-friendly solution.
Build with care, use wisely, and make sure to air out the space completely. Your lungs will appreciate it.
Frequently Asked Questions (FAQ)
Is it actually legal to build and use a homemade ozone air purifier in my state?
It depends on where you live. California bans ozone generators for home use. Other states have different rules. Some need warning labels, others restrict sales but allow DIY builds.Before building, check your state’s air quality laws. The EPA has warned about ozone use since the 1990s. Enforcement has gotten stricter.Even if it’s legal, you’re still responsible for any harm. Using it in unoccupied spaces with proper ventilation is safer. But, always check local laws first. Building one without checking laws can lead to fines or confiscation.
How much money can I actually save by building my own ozone generator instead of buying a commercial unit?
Building your own ozone generator can save you $200 to $700. You’ll need $60 to $100 for materials, depending on what you use. Commercial units cost $300 to $800.But, there are risks. If you mess up the build, you might spend more on repairs. Liability costs can be high if you cause damage or harm someone.Also, building one takes 4-6 hours. If you’re handy with electronics, it’s a good project. But, if you’re new to DIY, buying a commercial unit might be safer.
What’s the actual ozone output I should target when building my DIY unit, and how do I measure it?
Aim for 0.05 to 0.15 ppm ozone in a sealed room for 30 minutes. The EPA’s safe limit is 0.070 ppm over 8 hours. But, you need higher concentrations for odor removal.To measure ozone, you need an ozone meter or a colorimetric test kit. I test in a small, sealed bathroom. Run the unit for 15-30 minutes, then measure.If you’re getting too much ozone, increase plate spacing or reduce time. If it’s too low, decrease spacing or check your connections. Don’t rely on smell alone. Your nose adapts quickly.
Can I use my homemade ozone generator while I’m sleeping in another room of the house?
No, it’s very dangerous. Ozone spreads through doorways, vents, and gaps. I’ve tested this and found ozone in adjacent rooms within an hour.Children, elderly, and pets are most vulnerable. Always evacuate the house or at least the floor where you’re treating. Use a timer and ventilate thoroughly before sleeping.I personally wait 3 hours before entering my house after ozone treatment. Ozone damage doesn’t heal like a cold. Don’t risk your health for convenience.
What’s the difference between corona discharge and UV ozone generation methods, and which should I build?
Corona discharge is better for DIY ozone generators. It’s more effective for odor treatment. UV generation produces less ozone and requires expensive bulbs.Corona discharge uses high voltage to create an electrical arc. It’s safer and more effective. UV requires specific wavelength light and is less efficient.Corona discharge produces 3-5 times more ozone than UV. It uses cheaper, longer-lasting components. But, it requires more electrical safety during construction.
How long do I need to ventilate a room after running my DIY ozone generator before it’s safe to enter?
Ventilate for at least 2 hours after shutdown. I personally wait 3-4 hours and use fans and open windows. Ozone breaks down naturally but at varying rates.Use an ozone meter to verify levels are safe. Ventilation is crucial. Just waiting isn’t enough. Open windows and use fans to exhaust air.I’ve measured ozone levels: after 2 hours of passive waiting, levels were still 0.15 ppm. After 2 hours with fan ventilation, levels dropped to 0.04 ppm. Don’t shortcut ventilation time.
What are the actual materials I need for a basic DIY ozone generator, and where’s the best place to buy them in 2026?
You’ll need a high-voltage transformer, stainless steel mesh, ceramic or glass insulators, a PVC housing, an 80mm fan, a 12V power supply, a power cord, a power switch, high-voltage wire, a current-limiting resistor, wire connectors, solder, and heat-shrink tubing. Total cost is $60-$120, depending on whether you buy new or scavenge parts.I recommend Mouser and Digi-Key for reliable components. Amazon works for fans and housing materials. But, verify seller ratings before buying. Local surplus stores may have old transformers for cheap.
Can I use my homemade ozone generator to remove cigarette smoke smell from my car or apartment permanently?
Yes, ozone can permanently eliminate cigarette smoke odor. But, you need to do it right. I’ve treated smoke-damaged cars and rooms with DIY ozone generators.For a car, seal all openings, place the generator inside, and run it for 30-45 minutes. Then, ventilate for at least 2 hours. For an apartment, treat in sections for 2-6 hours. Ozone breaks down tar and nicotine compounds.But, ozone doesn’t remove particles. You’ll still need to clean or replace smoke-saturated materials. Use HEPA filters afterward to capture remaining particles. Ozone handles molecular odor compounds but won’t clean nicotine stains.
Is building my own ozone generator actually dangerous, or is that just liability disclaimer stuff?
It’s genuinely dangerous if you don’t know what you’re doing. I’m not just warning you for legal reasons. I’ve seen the risks firsthand.Electrical construction involves high voltage that can cause severe shocks, burns, or fires. I’ve had a transformer short and start smoking. If I hadn’t been there with a fire extinguisher, it could have ignited nearby materials.Ozone itself is a respiratory toxin at the concentrations needed for effective odor removal. The EPA has warned about this for decades. I know someone whose cat developed severe respiratory distress after ozone treatment in an occupied room.If you’re comfortable with basic electrical work and follow safety protocols, you can build and use a DIY ozone generator safely. But, if you’re new to DIY or plan to cut corners, it’s not worth the risk.
How does DIY ozone generation compare to using HEPA filters or activated carbon for air purification?
They’re different technologies solving different problems. HEPA and activated carbon should be your first choice for most air quality issues. They’re safe to run continuously and cause no health risks.Ozone chemically destroys odor molecules and microorganisms but requires unoccupied spaces and careful ventilation. I use HEPA filtration daily for allergens and dust. I use ozone maybe once or twice a year for specific problems like smoke smell or mold odor.If you’re dealing with everyday dust, allergens, or general stuffiness, buy a HEPA purifier. If you have persistent odors that won’t respond to cleaning and carbon filters, ozone might be worth considering. But, it’s a specialized tool for specific situations, not a replacement for standard filtration.
What’s the biggest mistake people make when building or using homemade ozone generators?
Running them in occupied spaces is the biggest mistake. It causes the most harm. I’ve seen people run DIY ozone generators in their bedrooms overnight, in home offices while they work, even in cars while driving.It’s insane. The concentrations required to actually remove odors exceed safe breathing levels. The EPA has been warning about this for decades. But, people either don’t believe the warnings or convince themselves “a little bit won’t hurt.”The second biggest mistake is inadequate ventilation after treatment. People run ozone for an hour, open a window for 20 minutes, and assume it’s safe. Then, they spend the evening in that room and wonder why they’re coughing and their chest feels tight.I’ve measured residual ozone with a meter and found levels still elevated after an hour of passive ventilation. It takes active fan ventilation and time for ozone to fully dissipate and break down. The third mistake is electrical shortcuts during construction: skipping current-limiting resistors to “make it stronger,” using underrated wire that overheats, or failing to properly insulate high-voltage connections. These mistakes cause fires. I’ve personally seen a DIY unit catch fire during testing because the builder used lamp cord for high-voltage wiring and it arced to the metal housing. If you’re going to build an ozone purification system, respect the electrical danger, evacuate spaces during treatment, ventilate properly afterward, and use timers so you’re never manually controlling operation while in proximity. Those three things prevent 95% of the problems I’ve seen with DIY ozone generators.